Markdown Syntax
We won't be teaching how to use the Markdown language. There are plenty of guides and videos on the internet. If you are looking for any recommendations, we recommend the basic syntax guide from Markdown Guide
In this section, we'll explore a few features made specifc to vai that goes beyond standard Markdown syntax and they are
Routing
Table Of Content (TOC)
It is important to take note that #, ## and ### in markdown files will be indexed in the table of container (TOC) on the righ column. using ### will cause that header to be indented inwards, while # and ## remains. This is often a useful visual indicator to show that there is a subheader for more information.
WARNING
although u can use multiple #, it is VERY STRONGLY recommended to only add one per page, and it should be at the top of the page. You should use this to indicate the main title of the page. This is good for SEO ranking. Whenever in doubt, just choose the title to be the same as the markdown file you created. For example, if you have created a 1-Test.md file, you should add # Test at the top of the md file
How to link pages and headers?
Clean URL
When you create a header in your document (e.g., ## Page Metadata), vai automatically generates a linkable ID for it by converting all the words to lowercase and spaces() to dashes (-). For instance, The header text ## Page Metadata gets the id page-metadata.
To link to a header for example, simply do this:
[Page Metadata](#page-metadata)
To link across pages, for example, simply do this:
[just an example](/introduction/what-is-vai/)
and you can link accross pages to a header via
[just an example](/introduction/what-is-vai/#a-random-header)
Info
Vai uses a number-Name folder structure. When linking to a first page of a section (e.g 1-introduction.md for a directory), you can simply reference the directory name without specifying the first page name (1-introduction.md). Vai will automatically direct users to the first page in that directory.
How to link images?
To link images, you must add your images inside of the static directory. When linking, you should link it via /static/<file-name>. For better organisation, it is encouraged to create a seperate directory (e.g. images) inside of the static directory to store your images and link them appropriately(e.g. /static/images/<file-name>).
Page Metadata
vai currently supports only 2 page metadata and they are title and date. Lets explain the simple syntax with a simple example below
+++
title: My Custom Page Title
date: January 1, 2024
+++

# Welcome to my page
...
TIP
If you only need one key, (title or date), include the one you want and leave out the other. Let's go through what the 2 keys do
title
 It modifes the current tab name to anything you want. By leaving this out, it defaults to the
 .md file name. For instance, you are editing a 1-Markdown Syntax.md. The title for your page would be Markdown Syntax.
date
You can specify a specific date and this date will be shown in the Last updated: section in the bottom right of the page. Leaving this out defaults to the date u edited your markdown file and convert it to html via vai run or vai build. The default date format would be DD-Month-YYYY (e.g. 9th October 2009 )
IMPORTANT
the values u put after date will be a string , meaning u can add any value (as long as it is a string) and it will be shown exactly in Last updated. it does not change dynamically and will have to be manually changed.
Code Blocks and Syntax Highlighting
Code Block
All Code Blocks in vai has a copy-and-paste mechanism when hovered over. Ensure that you leave a line before and after the backticks (```).
Syntax Highlighting
If you want to display code and support syntax highlighting we support it. You must use the fenced method for creating a code block (```) and specify the language beside it. We use Pygemnts for syntax highlighting and it has support for over 100+ languages
Syntax Example :
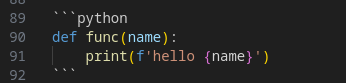
Which gives us :
def func(name):
    print(f'hello {name}')
We also support syntax highlighting from Highlight.js which also supports over 100+ languages. If you would like to use their syntax highlighting simply tab (4 spaces) the full fenced code.
Syntax Example : 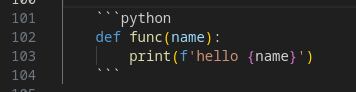
Which gives us :
```python
def func(name):
    print(f'hello {name}')
```
notice that the colours are slightly different.
Code blocks inside of lists
If you want code blocks inside of list without breaking the structure, simply indent the code block by two tabs (8 spaces) within the list item. All code blocks inside a list will strictly use highlight.js for syntax highlighting
Code blocks with syntax highlighting
For syntax highlighting, use fenced code blocks with backticks (```) and specify the language after the opening backticks.
Syntax Example : 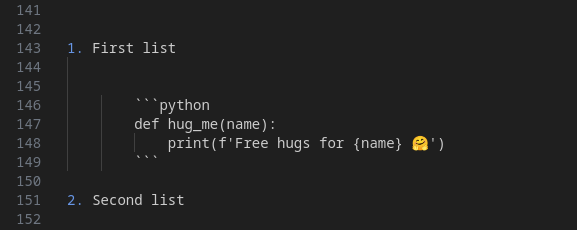
Which gives us :
First list
```python
def hug_me(name):
    print(f'Free hugs for {name} 🤗')
```
Second list
Code blocks without syntax highlighting
If you don’t want syntax highlighting, avoid using fenced code blocks altogether. Else, the backtick would be shown in the code block
Syntax Example : 
Which gives us :
first list
Random code block 🤗second list
Admonition Blocks (:::)
We provide a few pre-made admonition block u can use. the syntax for it is
## some random content

:::<admonition-type> <optional-name>

content

:::

## more random content
- There must be nothing before and after the
:::. In other words, you should leave a line before and after the::: - not specifying a name will default to the admonition's type name
Below is the list of premade blocks and their syntax :
1. note
Note
hello there
syntax
:::note
hello there
:::
1a. note (custom single name)
vai
hello there
syntax
:::note vai
hello there
:::
1b. note (custom multiple name)
welcome to VAI
hello there
syntax
:::note welcome to vai
hello there
:::
You can also do the custom naming for the admonition blocks below with the same syntax
2. tip
Tip
hello there
syntax
:::tip
hello there
:::
3. warning
Warning
hello there
syntax
:::warning
hello there
:::
4. danger
Danger
hello there
syntax
:::danger
hello there
:::
5. info
Info
hello there
syntax
:::info
hello there
:::
6. important
Important
hello there
syntax
:::important
hello there
:::
7. details
details

syntax
:::details

:::